In 2019, LEGO released an official MicroPython image for Lego EV3, which can “use your EV3 Brick to unleash the power of Python programming”. EV3 MicroPython version v2.0 was released very recently to support more sensors and new features.
Installation
The installation follows the standard way to flash an embedded Linux system onto an micro SD card. You don’t need to worry about bricking your EV3 because it is a separate OS running from the SD card. You can switch back to the standard LEGO EV3 firmware by simply removing the micro SD card.
- Download the EV3 MicroPython micro SD card image.
- Extract the zip file and flash it onto an micro SD card using Etcher.
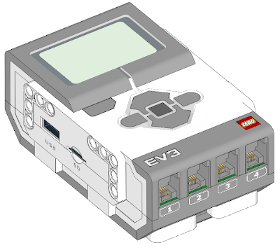
- Insert your micro SD card into the EV3 Intelligent Brick SD card slot.
More detailed installation instructions can be find in the Getting Started Guide.
EV3Brick Class
Version 2.0 of the MicroPython firmware introduces the EV3Brick class to replace the ev3brick module. The EV3Brick class improves the speed and reliability of the EV3 screen and the EV3 speaker. It also adds functionality like speech and drawing shapes.
EV3Brick
Draw Shapes
We want to draw circles, rectangles, and triangles randomly on EV3 Intelligent Brick screen. Our final project will look like this:
Randomize Coordinates
The x and y coordinates for each shape has to be generated randomly. EV3 MicroPython stdlib has the pre-compiled urandom module so I don’t need to download additional modules from micropython-lib repository.
import urandom

def rand_coor():
    """EV3 screen size is 178px x 128px"""

    return (urandom.randint(0, 177), urandom.randint(0, 127))
Circles, Rectangles and Triangles
The new EV3Brick class supports basic shapes like rectangles screen.draw_box() and circles screen.draw_circle(). It is very straightforward to call the built-in functions directly.
from pybricks.hubs import EV3Brick

ev3 = EV3Brick()

def draw_circle():
    """Randomize center coordinates and radius"""

    x, y = rand_coor()
    r = urandom.randint(16, 32)

    ev3.screen.draw_circle(x, y, r)

def draw_rectangle():
    """Randomize top-left and bottom-right corners"""

    x1, y1 = rand_coor()
    x2, y2 = rand_coor()

    ev3.screen.draw_box(x1, y1, x2, y2)
EV3Brick doesn’t have built-in functions for triangles but we can generate three vertex coordinates and connect them simply by screen.draw_line().
def draw_triangle():
    """Randomize three vertex coordinates"""

    x1, y1 = rand_coor()
    x2, y2 = rand_coor()
    x3, y3 = rand_coor()

    ev3.screen.draw_line(x1, y1, x2, y2)
    ev3.screen.draw_line(x2, y2, x3, y3)
    ev3.screen.draw_line(x3, y3, x1, y1)
Say Shape Names
To make things more interesting, we can also program the EV3Brick to say shape names. speaker.say() is a new built-in function to say a given text string.
shapes = ['circle', 'rectangle', 'triangle']

for _ in range(20):
    shape = urandom.choice(shapes)
    ev3.speaker.say(shape)

    if shape == 'circle':
        draw_circle()
    elif shape == 'rectangle':
        draw_rectangle()
    elif shape == 'triangle':
        draw_triangle()
That’s it. In the main program loop, we randomly select one shape from the supported shape list shapes. Our EV3 Intelligent Brick will say the shape name and draw it on the screen.
EV3Brick Class Reference
screen.draw_line(x1, y1, x2, y2, width=1, color=Color.BLACK)
Draws a line on the screen.
screen.draw_box(x1, y1, x2, y2, r=0, fill=False, color=Color.BLACK)
Draws a box on the screen.
screen.draw_circle(x, y, r, fill=False, color=Color.BLACK)
Draws a circle on screen.
speaker.say(text)
Says a given text string.